Menu Bars and Toolbars
How to dock a toolbar to another toolbar in the same row?
Here is the code snippet that allows you to dock a m_wndToolBar2 toolbar to the right side of a m_wndToolBar1 toolbar in the same row. CRect wrAlreadyDockedBar;
m_wndToolBar1.GetWindowRect( &wrAlreadyDockedBar );
wrAlreadyDockedBar.OffsetRect( 1, 0 );
DockControlBar(&m_wndToolBar2,AFX_IDW_DOCKBAR_TOP,&wrAlreadyDockedBar);
RecalcLayout(); How to display tooltips for menu items?
The tooltip is implemented in the CExtPopupMenuTipWnd class and allows you to display tooltips of several shape types, which are listed in the CExtPopupMenuTipWnd::e_tip_style_t enumeration: enum e_tip_style_t
{
__ETS_NONE = 0,
__ETS_BALLOON = 1,
__ETS_BALLOON_NO_ICON = 2,
__ETS_RECTANGLE = 3,
__ETS_RECTANGLE_NO_ICON = 4,
__ETS_INV_RECTANGLE = 5,
__ETS_INV_RECTANGLE_NO_ICON = 6,
};The global variable CExtPopupMenuWnd::g_eTtsClassicMenu specifies the current tooltip type. By default, it is set to CExtPopupMenuTipWnd::__ETS_NONE and the tooltip is hidden. So, to display the tooltip of a certain type, set CExtPopupMenuWnd::g_eTtsClassicMenu to one of the CExtPopupMenuTipWnd::e_tip_style_t enumeration values. For example: CExtPopupMenuWnd::g_eTtsClassicMenu = CExtPopupMenuTipWnd::__ETS_BALLOON How to set a palette layout for a toolbar?
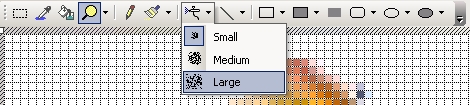
By default, toolbar buttons takes up one row when the toolbar is docked or floating. When it is floating, you can resize it to rearrange buttons in two or more rows but, if you dock it back, its one row layout will be restored back. You can however set up the toolbar so it has a fixed size and a multiple row layout (also known as a palette layout) even when it is docked (see the figure below). To turn this mode on, set its m_bPaletteMode property to true. Because this extends the functionality provided by MFC's TBBS_WRAPPED, the following wrap flags were added to the CExtBarButton class: __EVT_FLOAT__EVT_HORZ__EVT_VERT
This allows you to set up three different layouts for when the toolbar is floating, docked horizontally and docked vertically. Please note that in this mode, the toolbar always has a fixed size. The typical way of setting up a multi row layout for toolbar may look like as follows: m_wndPalette.m_bPaletteMode = true; // turn on palette mode for toolbar
int nBtnIdx = m_wndPalette.GetButtonsCount(); // get count of toolbar buttons (you may need it)
// set wrap flags for a particular button i:
m_wndPalette.GetButton( i )->SetWrap( CExtBarButton::__EVT_FLOAT );
m_wndPalette.GetButton( i )->SetWrap( CExtBarButton::__EVT_HORZ ); You can find an example of setting up a palette layout in the DRAWCLI sample. How to use a small icon in menus and a large icon in toolbars for the same command?
Because any particular command cannot be assigned icons of different sizes, you should use different command identifiers in toolbars and menus and assign the same command handlers to them. The steps below outline how you can create a small menu item (16x16) and a large toolbar button (32x32) which will be working as a single command (e.g. File | Open): 1) Add a menu item (ID_FILE_OPEN_16X16) to the IDR_MAINFRAME menu resource. 2) Add a new icon (ID_FILE_OPEN_32X32) to the IDR_MAINFRAME toolbar resource with 32x32 icons. 3) Create a toolbar resource (IDR_MAINFRAME_SMALL_ICONS ) and add a small version (16x16) of the ID_FILE_OPEN_32X32 icon to this resource. Specify ID_FILE_OPEN_16X16 as is its ID. 4) Initialize the IDR_MAINFRAME toolbar using the CExtToolControlBar::LoadToolbar() method. This method indirectly updates the command manager with information about commands in this toolbar including ID_FILE_OPEN_32X32. 5) Update the command manager with information about commands in the IDR_MAINFRAME_SMALL_ICONS toolbar. You can do this directly with the g_CmdManager->UpdateFromToolBar( ..., IDR_MAINFRAME_SMALL_ICONS ) method call. 6) Add a command handler and a command update handler for the ID_FILE_OPEN_32X32 command to the main frame class using the Visual Studio's Wizard. The following line(s) will be added to the message map of the CMainFrame class: ON_COMMAND( ID_FILE_OPEN_32X32, OnFileOpen32X32 )
ON_UPDATE_COMMAND_UI( ID_FILE_OPEN_32X32, OnUpdateFileOpen32X32 ) 7) Use OnFileOpen32X32() and OnUpdateFileOpen32X32() added at the previous step as handler methods for the ID_FILE_OPEN_16X16 command by adding these two lines to the message map of the CMainFrame class: ON_COMMAND( ID_FILE_OPEN_16X16, OnFileOpen32X32 )
ON_UPDATE_COMMAND_UI( ID_FILE_OPEN_16X16, OnUpdateFileOpen32X32 ) How to specify that a toolbar bar can be docked only to a particular side(s) of the frame window?
When initializing a toolbar bar (typically in CMainFrame::OnCreate()), you can limit its target docking location to one or more sides of the frame window by specifying one of the following constants in the EnableDocking() method of this toolbar:
| Constant | Docking Site |
|---|
CBRS_ALIGN_TOP | Top side of the frame window. | CBRS_ALIGN_BOTTOM | Bottom side of the frame window. | CBRS_ALIGN_LEFT | Left side of the frame window. | CBRS_ALIGN_RIGHT | Right side of the frame window. | CBRS_ALIGN_ANY | Any side of the frame window. |
If you want your toolbar to be able to be docked to more than one side, use the bitwise inclusive OR operator, for example: wndToolBar.EnableDocking( CBRS_ALIGN_LEFT|CBRS_ALIGN_RIGHT ); How to create a high color toolbar?
As you know the Visual Studio resource editor allows you to edit only 16-color toolbars. In Prof-UIS, you can use 16, 256, True and High color bitmaps for your toolbars. Starting from version 2.53 you can even use 32-bit bitmaps with alpha channel. Here is how you can work around this Visual Studio limitation. 1) Create a 16-color version of your toolbar using the resource editor. 2) Open the bitmap file associated with the toolbar in any external image editor (e.g. Microsoft Paint -- mspaint.exe) and convert it to a high color format. 3) Edit the toolbar and do not use the Visual Studio image editor for editing this high color toolbar anymore. Please note if you need to change the toolbar configuration (e.g., to add or remove a button), you can do this by editing the resource file manually. It is not difficult and you can find the details in the FAQ How to remove a button from the toolbar resource with more than 16 colors?. Icons on toolbar buttons do not show up. What's wrong?
The information about any command associated with toolbar buttons and menu items is stored in the command manager (the g_CmdManager global pointer). So, the main case when the icons do not show up is when you forgot to initialize the command manager for your main frame or dialog window. If you do not call g_CmdManager->ProfileSetup() and/or g_CmdManager->ProfileWndAdd() code during the application startup and do not specify HWND of the main frame or dialog window in those methods, then both toolbars and pop-up menus cannot find the command descriptions (e.g. icons) in the command manager. How to put a toolbar on the dialog in the control bar?
The ProfStudio sample shows how toolbars can be used on dialogs in dockable control bars. Of course, such toolbars cannot be dockable. For instance, the Class View window is implemented as a resizable dialog (IDD_DIALOG_CLASSVIEW ) with a toolbar and a tree-view control inside.
Create a dialog resource in your project and set the same properties for it as it is done for the IDD_DIALOG_CLASSVIEW dialog in the ProfStudio project, copy or create the IDC_CLASS_VIEW_TOOLBAR custom control and define one or more controls to occupy the rest of the dockable dialog. You also need to stick the toolbar to a dialog side. Here is what you need to do in the code:
- Define the
CExtToolControlBar m_wndToolBar; property in your dockable dialog class and add the line below to the DoDataExchange() method of your dialog class:DDX_Control(pDX, IDC_CLASS_VIEW_TOOLBAR, m_wndToolBar); - Call
wndToolBar.LoadToolbar(...) in the OnInitDialog() method - Add the following line at the end of the
OnInitDialog() method:RepositionBars(0,0xFFFF,IDC_TREE_CLASS_VIEW); IDC_TREE_CLASS_VIEW value corresponds to the dialog control identifier of the window that should fit the rest of the dialog space. - Add a
WM_SIZE message handler to make both toolbar and your control occupy valid parts of the dockable dialog:void CProfStudioClassView::OnSize(UINT nType, int cx, int cy)
{
CExtResizableDialog::OnSize(nType, cx, cy);
RepositionBars(0,0xFFFF,IDC_TREE_CLASS_VIEW);
}
How to set a drag outline for a toolbar or a control bar being dragged over the screen?
In Prof-UIS classes for menu bars, toolbars and control bars there is a virtual method _IsShowContentWhenDragging(), which specifies in which way a dragged window is drawn. If the method returns true, it is completely redrawn when you are dragging it; otherwise only a drag outline is drawn. For example, you can switch to a drag outline for a toolbar by overriding _IsShowContentWhenDragging() of the CExtToolControlBar class: class CMyToolControlBar : public CExtToolControlBar
{
protected:
virtual bool _IsShowContentWhenDragging() const
{
return false;
}
};How to display both an icon and text for a toolbar button or a menu item in a customizable application?
If your application is customizable (i.e., it is based on CExtCustomizeSite), any command item in a menu or a toolbar has two command tree nodes: the initial and the customized. The initial node is used for resetting the properties of a command tree node in the customize mode (when the Customize dialog is open and the user can edit/reset any command properties). The command tree nodes are implemented as instances of the CExtCustomizeCmdTreeNode class. You can get both nodes for each toolbar button and change its display style to Text and Image. Here is the example code: void CMainFrame::_SetCmdStateTextAndImage
( CExtToolControlBar * pBar, UINT nCmdID )
{
// get the root command tree nodes for toolbar
// (children nodes of these roots are representing
// command buttons in toolbar)
CExtCustomizeCmdTreeNode * pNodeRootInitial =
CExtCustomizeSite::GetToolbarCmdNode(
pBar,
true
);
ASSERT_VALID( pNodeRootInitial );
CExtCustomizeCmdTreeNode * pNodeRootCurrent =
CExtCustomizeSite::GetToolbarCmdNode(
pBar,
false
);
ASSERT_VALID( pNodeRootCurrent );
// get the command tree nodes for the
// toolbar button with command nCmdID
CExtCustomizeCmdTreeNode * pNodeButtonInitial =
pNodeRootInitial->ElementAt(
pNodeRootInitial->SearchNode( nCmdID )
);
ASSERT_VALID( pNodeButtonInitial );
CExtCustomizeCmdTreeNode * pNodeButtonCurrent =
pNodeRootCurrent->ElementAt(
pNodeRootCurrent->SearchNode( nCmdID )
);
ASSERT_VALID( pNodeButtonCurrent );
// change display style of button's nodes
// (remove display style flags and then assign new)
pNodeButtonInitial->ModifyFlags( 0, __ECTN_DISPLAY_MASK );
pNodeButtonCurrent->ModifyFlags( 0, __ECTN_DISPLAY_MASK );
pNodeButtonInitial->ModifyFlags( __ECTN_DISPLAY_TEXT_AND_IMAGE );
pNodeButtonCurrent->ModifyFlags( __ECTN_DISPLAY_TEXT_AND_IMAGE );
}How to remove a button from the toolbar resource with more than 16 colors?
Unfortunately the Visual Studio IDE does not allow you to edit toolbar resources with more than 16 colors. But you can always edit the resource file and bitmap manually. Here is how to remove the first button from the IDR_MAINFRAME toolbar (command ID_FILE_NEW, project DrawCli): - Open the bitmap file (TOOLBAR_1_16bit.bmp) in an external image editor (e.g. Microsoft Paint), remove the first icon and move all other icons to the left. Save the file.
- Open the project resource file (DRAWCLI.rc) in an external text editor (e.g. Microsoft NotePad), find the "IDR_MAINFRAME TOOLBAR" section and remove the row with command
ID_FILE_NEW. The section should now look like:IDR_MAINFRAME TOOLBAR MOVEABLE PURE 16, 15
BEGIN
BUTTON ID_FILE_OPEN
BUTTON ID_FILE_SAVE
SEPARATOR
BUTTON ID_EDIT_CUT
BUTTON ID_EDIT_COPY
BUTTON ID_EDIT_PASTE
SEPARATOR
BUTTON ID_DRAW_SELECT
BUTTON ID_DRAW_LINE
...
...
How to prevent a disabled drop-down button from displaying a pop-up menu associated with it?
Although in many cases to disable only menu items in the pop-up menu seems to be more preferable (e.g., drop-down buttons in Microsoft Office applications), there is no doubt that in some cases it is reasonable to disable producing such a menu at all (like Back and Forward buttons in Internet browsers). Below is described how it can be done.
Create a CExtBarButton-derived class and override the CanBePressedInDisabledState() virtual method which should do nothing except return false. Now you need to use this button in your toolbars. Create your own CExtToolControlBar-derived class and override the OnCreateBarCommandBtn() virtual method that creates a new instance of your button. Finally, if your application is customizable, please override the CExtCustomizeSite::OnUserBarCreate() virtual method. This method creates instances of your toolbar type. Use the method body from the original method and modify only the code responsible for creating this button. How to dynamically update the contents of the menu activated from the drop-down button built in a toolbar/menu?
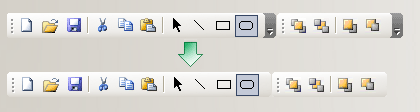
There is a very simple method to create a toolbar button with a separated drop-down area (see Figure at the bottom) which is tracking the dynamically created menu.
1) Create a toolbar button with a drop-down menu and assign a menu (e.g., IDR_DYNAMIC_POPUP_MENU) to it. This menu should have a temporary menu item with a certain ID (e.g., ID_TEMP)INT nBtnIdx = m_wndToolBar.CommandToIndex( ID_SOME_CMD );
ASSERT( nBtnIdx >= 0 );
CMenu _line_menu;
VERIFY( _line_menu.LoadMenu( IDR_DYNAMIC_POPUP_MENU ) );
VERIFY( m_wndToolBar.SetButtonMenu(
nBtnIdx, _line_menu.Detach() ) );
CExtBarButton * pTBB =
m_wndToolBar.GetButton(nBtnIdx);
ASSERT_VALID( pTBB );
pTBB->SetSeparatedDropDown();CExtPopupMenuWnd::g_nMsgPrepareMenu message is sent each time a menu is about to appear on the screen. So, just search for the temporary menu item with the specified ID in message handler, and, if it is found, just remove it and add any required item(s):LRESULT CMainFrame::OnExtMenuPrepare(WPARAM wParam, LPARAM lParam)
{
CExtPopupMenuWnd::MsgPrepareMenuData_t * pData =
reinterpret_cast<
CExtPopupMenuWnd::MsgPrepareMenuData_t *
>( wParam );
ASSERT( pData != NULL );
CExtPopupMenuWnd * pPopup = pData->m_pPopup;
ASSERT( pPopup != NULL );
INT nItemPos = pPopup->ItemFindPosForCmdID(
ID_TEMP
);
if( nItemPos >= 0 )
{
pPopup->ItemRemove( nItemPos );
pPopup->ItemInsert(
nCmdID,
nItemPos
);
}
}
How to show/hide a toolbar correctly?
It depends on the design of your application.
If you have dockable toolbars in a CFrameWnd-based application, do not use ShowWindow of CWnd because, when a toolbar gets displayed/hidden, this affects the layout of other windows. Just use CFrameWnd::ShowControlBar instead:
ShowControlBar(
&m_wndToolBar, //Pointer to the control bar to be shown or hidden
FALSE, // Hide if FALSE or show if TRUE
FALSE // Immediately if FALSE
);
If you use a toolbar on a dialog, the methods of CWnd are appropriate:
m_wndToolbar.ShowWindow( SW_HIDE ); // Hide or use SW_SHOW to show
CWnd::RepositionBars( 0, 0xFFFF, 0 );
How to set the initial positions of toolbars when the application starts for the first time?
When your application runs for the first time, toolbars are docked in their default positions. You can set these positions in, for example, the CMainFrame:OnCreate method. You can dock some toolbars in a particular row. You can dock some other toolbars in their own separate rows. The following code demonstrates this idea: // Dock m_wndToolBar1 in row 1
DockControlBar(&m_wndToolBar1); // Docked in row 1
RecalcLayout();
// Dock m_wndToolBar2 in row 1 next to m_wndToolBar1
CRect wrAlreadyDockedBar;
m_wndToolBar1.GetWindowRect( &wrAlreadyDockedBar );
wrAlreadyDockedBar.OffsetRect( 1, 0 );
DockControlBar(&m_wndToolBar2,AFX_IDW_DOCKBAR_TOP,&wrAlreadyDockedBar);
RecalcLayout();
// Dock m_wndToolBar1 in row 2
DockControlBar(&m_wndToolBar3);
// Dock m_wndToolBar1 in row 3
DockControlBar(&m_wndToolBar4); Please note when the application runs for the second time, Prof-UIS restores toolbar positions saved in the registry before. How to replace the standard MFC toolbar with that of Prof-UIS in the frame window?
First, include ExtToolControlBar.h into the header file of the frame window. Second, replace the CToolBar class name with CExtToolControlBar. Finally, modify the code in the OnCreate() handler of the frame window: if( !m_wndToolBar.Create( _T( "Toolbar name"),
this,
AFX_IDW_TOOLBAR
)
|| !m_wndToolBar.LoadToolBar( IDR_MAINFRAME )
)
{
TRACE0( "Failed to create toolbar" );
return -1;
}How to insert controls into the toolbar?
Create a control with the dialog control identifier equal to the ID of an existing button on the toolbar. Then, assign the control to the button by calling the CExtToolControlBar::SetButtonCtrl() method.
If there is no command with such ID in the application menu (which means no text is set for this command when it appears in menus, e.g., in the menu activated from the toolbar chevron button), then it is recommended to set a menu text for this command:
if( !m_ComboHelpSearch.Create(
      WS_CHILD | WS_VISIBLE | CBS_DROPDOWN,
      CRect( 0, 0, 200, 480 ),
      &m_wndToolBarMain,
      ID_HELP_SEARCH_COMBO
      )
   || !m_wndToolBarMain.SetButtonCtrl(
       m_wndToolBarMain.CommandToIndex(
          m_ComboHelpSearch.GetDlgCtrlID() ),
          &m_ComboHelpSearch
       )
)
{
    TRACE0("Failed to create help search combobox\n" );
    return -1;
}

m_ComboHelpSearch.SetItemHeight( -1, 16 );

m_ComboHelpSearch.SetFont( &g_PaintManager->m_FontNormal );
g_CmdManager->CmdGetPtr(
          m_ComboHelpSearch.GetDlgCtrlID()
       )-> m_sMenuText = _T( "Search help system" );
How to set/change text for toolbar buttons and menu items associated with a particular command?
Get the command identifier from the command manager and, then, set the text attributes m_sToolbarText and m_sMenuText. If you are setting/changing text after the frame window has already been created, do not forget to call the RecalcLayout() method of the frame. CExtCmdManager::cmd_t * p_cmd;
p_cmd = g_CmdManager->CmdGetPtr( ID_... );
ASSERT( p_cmd != NULL );
p_cmd->m_sMenuText = _T( "Menu text" );
p_cmd->m_sToolbarText = _T( "Toolbar text" );

How to set a menu for the toolbar button?
The CExtToolControlBar class stores the HMENU
attribute for every button. So, you can do this by invoking
CExtToolControlBar::SetButtonMenu():
CExtCmdManager::cmd_t * p_cmd;
CMenu _menu;
p_cmd = g_CmdManager->CmdGetPtr(ID_CMD_...);
ASSERT( p_cmd != NULL );
VERIFY( _menu.LoadMenu(ID_MENU_...);
VERIFY(
    m_wndToolBarMain.SetButtonMenu(
        m_wndToolBarMain.CommandToIndex(ID_CMD_...),
        _menu.Detach(),
        TRUE
        )
    );
How to specify initial positions of toolbars that may be initially hidden?
First of all, to specify initial positions of the toolbars ( CExtToolControlBar), you need to use the CFrameWnd::DockControlBar() method rather than CExtControlBar::DockControlBar(). This is also true for the menu bar ( CExtMenuControlBar) and panel control bars ( CExtPanelControlBar). Let's assume you have two toolbars ( m_wndToolBar1 and m_wndToolBar2 toolbars which you want to dock into one row and either of them may be initially invisible.
- Both control bars are initially visible:
CRect wrAlredyDockedBar;
DockControlBar( &m_wndToolBar1 );
RecalcLayout();
m_wndToolBar1.GetWindowRect(
   &wrAlredyDockedBar
);
wrAlredyDockedBar.OffsetRect( 1, 0 );
DockControlBar(
   &m_wndToolBar2,
   AFX_IDW_DOCKBAR_TOP,
   &wrAlredyDockedBar
); - The second control bar is invisible:
CRect wrAlredyDockedBar;
DockControlBar( &m_wndToolBar2 );
RecalcLayout();
m_wndToolBar2.GetWindowRect(
   &wrAlredyDockedBar
);
DockControlBar(
   &m_wndToolBar1,
   AFX_IDW_DOCKBAR_TOP,
   &wrAlredyDockedBar
);
ShowControlBar(
   &m_wndToolBar2,
   FALSE,
   FALSE
); m_wndToolBar2 after m_wndToolBar1. - The first control bar is invisible:
CRect wrAlredyDockedBar;
DockControlBar( &m_wndToolBar1 );
RecalcLayout();
m_wndToolBar1.GetWindowRect(
   &wrAlredyDockedBar
);
DockControlBar(
   &m_wndToolBar2,
   AFX_IDW_DOCKBAR_TOP,
   &wrAlredyDockedBar
);
ShowControlBar(
   &m_wndToolBar1,
   FALSE,
   FALSE
); - Both control bars are invisible:
CRect wrAlredyDockedBar;
DockControlBar( &m_wndToolBar1 );
RecalcLayout();
m_wndToolBar1.GetWindowRect(
   &wrAlredyDockedBar
);
wrAlredyDockedBar.OffsetRect( 1, 0 );
DockControlBar(
   &m_wndToolBar2,
   AFX_IDW_DOCKBAR_TOP,
   &wrAlredyDockedBar
);
ShowControlBar(
   &m_wndToolBar1,
   FALSE,
   FALSE
);
ShowControlBar(
   &m_wndToolBar2,
   FALSE,
   FALSE
);
I need to change the font used for menu items. How to do this?
You can customize the look of any menu item and subitem in a way that most closely matches your tastes. For this you need to use custom drawing. For example, the CPagePopupMenus::OnDrawPopupMenuItem() method in the ProfUIS_Controls sample application handles the CExtPopupMenuWnd::g_nMsgPopupDrawItem registered windows message and performs custom drawing of the menu item specified with ID_OWNERDRAW_ITEM. So, if you select the Popup Menu page in this application and invoke the context menu, you will see this custom menu item with a gradient background. The pointer to the CExtPopupMenuWnd::DRAWITEMDATA structure is passed in the WPARAM parameter of the CExtPopupMenuWnd::g_nMsgPopupDrawItem message. So, first of all, your painting code should invoke pDrawItemData->PaintDefault( false, true ) to draw the entire menu item but its text. To compute the text rectangle, use this code: CRect rcText = *pDrawItemData->m_pRectItem;
rcText.left = pDrawItemData->m_pItemData->GetIconAreaWidth();
After that you can draw a text string using your custom fonts. Please do not forget to add the definition below to the message map of the window class that repaints menu items: ON_REGISTERED_MESSAGE(
CExtPopupMenuWnd::g_nMsgPopupDrawItem,
OnDrawPopupMenuItem
)How to create a toolbar button with a submenu?
First of all, add a menu resource with one root pop-up item (the text is unimportant). This menu will be used by the toolbar button. Please register this menu in the command manager by calling g_CmdManager->UpdateFromMenu() (similar to how you do this for a menu in the menu bar). After that, put the following lines after the code responsible for creating the toolbar: INT nBtnIdx =
m_wndToolBar.CommandToIndex(
ID_BUTTON_FOR_MENU
);
ASSERT( nBtnIdx >= 0 );
CMenu _menu;
VERIFY(
_menu.LoadMenu(
IDR_MENU_RESOURCE_FOR_BUTTON
)
);
VERIFY(
m_wndToolBar.SetButtonMenu(
nBtnIdx,
_menu.Detach()
)
); If you want the button face to be split into two parts (a drop-down button), call the following methods after the button menu is attached: CExtBarButton * pTBB =
m_wndToolBar.GetButton( nBtnIdx );
ASSERT_VALID( pTBB );
pTBB->SetSeparatedDropDown(); If you want your button to look in the vertically docked toolbar the same as it looks in the horizontally docked toolbar, call pTBB->SetNoRotateVerticalLayout(); For the button with a drop-down arrow (a drop-down button), you may need to set the initially selected command: pTBB->SetAutoChangeID();
pTBB->SetCmdID(ID_INITIALLY_SELECTED_COMMAND,true); How to add buttons to toolbars dynamically?
You can insert one or more additional buttons to the toolbar by inserting the following code snippet immediately after you have created the toolbar in the OnCreate method of the mainframe: int nButtonsCount = m_wndToolbar.GetButtonsCount();
// Let's append the separator to the end
m_wndToolbar.InsertButton(
nButtonsCount++,
ID_SEPARATOR
);
// Let's append the button specified with ID_YOUR_COMMAND
m_wndToolbar.InsertButton(
nButtonsCount ++,
ID_YOUR_COMMAND
); Please note that any command identifier such as ID_YOUR_COMMAND that you are going to use in toolbars must be registered in the command manager. The Prof-UIS toolbar control stores only command identifiers and gets the additional information related to them (corresponding icons, tooltips, and etc.) from the command manager. The following code may be used to allocate a new dynamic command identifier in the command manager: // Set it to zero to allow the command manager
// to find the dynamic identifier atomatically
UINT nCmdID = ID_YOUR_COMMAND;
LPCTSTR strProfileName =
g_CmdManager->ProfileNameFromWnd(
m_wndToolbar.GetSafeHwnd()
);
ASSERT( strProfileName != NULL );
CExtCmdItem * pCmdItem =
g_CmdManager->CmdAllocPtr(
strProfileName,
nCmdID
);
ASSERT( pCmdItem != NULL );
pCmdItem->m_sTipTool = _T("tooltip text");
pCmdItem->m_sTipStatus = _T("statusbar text");
pCmdItem->m_sMenuText = _T("text in menu");
pCmdItem->m_sToolbarText = _T("text in toolbar");
// you may also load an 16x16 icon
// and assign it to the command
HICON hIcon = (HICON)::LoadImage(
::AfxGetResourceHandle(),
MAKEINTRESOURCE(IDI_YOUR_ICON),
IMAGE_ICON,
16,
16,
0
);
ASSERT( hIcon != NULL );
g_CmdManager->CmdSetIcon(
strProfileName,
pCmdItem->m_nCmdID,
hIcon,
false // Use the hIcon handle "as is"
);You can also allocate new commands and insert buttons into toolbars dynamically at run-time, after the execution of CMainFrame::OnCreate is completed. For this purpose, the same code lines may be used but then you need to recalculate the layout of the toolbar's parent window: CFrameWnd * pFrame =
m_wndToolbar.GetParentFrame();
ASSERT_VALID( pFrame );
pFrame->RecalcLayout(); Finally, if you want to remove a button from a toolbar, you need to know the button's index first. int nButtonIndex =
wndToolbar.CommandToIndex( nCmdID );
if( nButtonIndex >= 0 )
wndToolbar.RemoveButton( nButtonIndex ); I don't want icons in menus available from the menu bar. What I need to do?
Add a message handler for the CExtPopupMenuWnd::g_nMsgPopupDrawItem registered message to your frame window and avoid painting icons for particular commands:
- Method declaration:
afx_msg LRESULT OnDrawPopupMenuItem( WPARAM wParam,
LPARAM lParam );
- Message map entry:
ON_REGISTERED_MESSAGE(
        CExtPopupMenuWnd::g_nMsgPopupDrawItem,
        OnDrawPopupMenuItem
        )
- Method body:
LRESULT CMainFrame::OnDrawPopupMenuItem(
    WPARAM wParam,
    LPARAM lParam
    )
{
CExtPopupMenuWnd::DRAWITEMDATA * pDrawItemData =
        reinterpret_cast
            < CExtPopupMenuWnd::DRAWITEMDATA * >
                  ( lParam );
    ASSERT( pDrawItemData != NULL );
    pDrawItemData->PaintDefault(
        true, // no paint icon
        false, // no paint text
        false, // no paint check/radio mark
        false, // no paint as enabled
        false, // no paint as unselected
        );
    // returns a non-zero value if the item is repainted
    // by this message handler
    return (!0);
}
This method suppresses icon painting for any menu in the frame window. To detect whether the menu bar has an open drop-down menu, call the CExtToolControlBar::GetMenuTrackingButton method of the menu bar window. This method returns a negative value if no menu is open. How to remove document buttons from the menu bar when MDI windows are maximized?
Just create a class derived from the CExtMenuControlBar class and override the IsDisplayMdiDocumentButtons virtual method like as follows:
bool CMyMenuBar::IsDisplayMdiDocumentButtons() const
{
    return false; // default implementation returns true
}
How to remove the chevron button from the toolbar?
To remove the right-most button in the toolbar, which is also known as "a toolbar option button" or "chevron button", override the CExtToolControlBar::OnCreateBarRightBtn method and just return NULL: class CMyToolControlBar : public CExtToolControlBar
{
virtual CExtBarContentExpandButton * OnCreateBarRightBtn(){
return NULL;
}
};
How to replace menu/toolbar icons dynamically?
The Prof-UIS toolbar stores only command identifiers of its buttons. When it needs an icon, it gets it from the command manager. So, you need to use the CmdSetIcon method of the command manager. The code below assigns a new icon (specified by the nIconID variable which is an icon resource identifier) to the command with nCmd identifier:
void CMainFrame::SetMyIcon( UINT nCmd, UINT nIconID )
{
    HICON hNewIcon = NULL;
    HINSTANCE hInstResource =
        AfxFindResourceHandle(
            MAKEINTRESOURCE( nIconID ),
            RT_GROUP_ICON
        );
    ASSERT( hInstResource != NULL );
    if( hInstResource != NULL ) {
        hNewIcon =
            (HICON)::LoadImage(
                hInstResource,
                MAKEINTRESOURCE( nIconID ),
                IMAGE_ICON,
                16, // icon’s width in pixels
                16, // icon’s height in pixels
                0
            );
        ASSERT( hNewIcon != NULL );
    }
    if( hNewIcon != NULL ){
        g_CmdManager->CmdSetIcon(
            g_CmdManager->ProfileNameFromWnd( GetSafeHwnd() ),
            nCmd,
            hNewIcon,
            true // false - use hIcon “as is”,
                 // true - use cloned hIcon
        );

        // If a new icon is of the same size as
        // the previous one, you should invalidate
        // youroolbar, otherwise, you need to recalculate
        // the layout of toolbar’s parent frame:

        if(m_wndToolBar .IsVisible() ){
            m_wndToolBar.GetParentFrame()->RecalcLayout();
            m_wndToolBar.Invalidate();
            m_wndToolBar.UpdateWindow();
        }
    }
}
NOTE: This code associates a new icon with a specified command identifier and the new icon will be assigned to all the toolbar/menu items with the same identifier.
If you have any questions, please visit our forum or contact our technical support team at support@prof-uis.com.

|